Why run your own relay?
Opening your main PC to the internet with port forwarding is a security risk, and leaving it on around the clock wastes power. A small Linux server or Raspberry Pi relay gives you the lowest possible latency, no port forwarding to the PCs you access, less power consumption, no GDPR concerns about third‑party servers and Wake‑on‑LAN from outside your network. Even if the relay is attacked, all data passing through it is encrypted with keys the server never has.
This guide assumes you already have SSH access to the Linux machine and the necessary permissions.
Version 2 of the Remotly Relay Server adds support for TLS and an access password. Even without TLS every connection is end‑to‑end encrypted with RSA-4096 and AES-256; TLS adds a redundant transport layer for strict firewalls at the cost of extra CPU. The access password prevents random users who discover your server's IP and port from using it.
1. Pick the package for your device
Run uname -m on the server and download the package that matches the result:
- x86_64 — Linux amd64 (64-bit Intel/AMD servers and VPS): remotly‑relay‑linux‑amd64-v2.zip
- aarch64 — ARM64 (Raspberry Pi 3, 4 and 5 with a 64-bit system, ARM cloud instances): remotly‑relay‑linux‑arm64-v2.zip
- armv7l — 32-bit ARM (Raspberry Pi 2, 3 and 4 with 32-bit Raspberry Pi OS): remotly‑relay‑linux‑arm7-v2.zip
Raspberry Pi Zero and Raspberry Pi 1 (ARMv6) are not supported.
2. Installation
- Connect to the server over SSH (for example with OpenSSH, WinSCP or FileZilla). All following commands run on the server.
- Download the package for your architecture, e.g. for ARM64: wget https://downloads.mirillis.com/files/remotly‑relay‑linux‑arm64-v2.zip
- Unzip it: unzip remotly‑relay‑linux‑arm64-v2.zip — if unzip is missing, install it with sudo apt‑get update && sudo apt‑get install unzip.
- Move the files to /srv/remotly, where the service expects them: sudo mv remotly‑relay /srv/remotly
- Set the owner and permissions: sudo chown -R root:root /srv/remotly && sudo chmod -R 755 /srv/remotly. The configuration holds the password, so make it readable for root only: sudo chmod 600 /srv/remotly/config/remotly‑relay.json
uname -m
wget https://downloads.mirillis.com/files/remotly‑relay‑linux‑arm64-v2.zip
unzip remotly‑relay‑linux‑arm64-v2.zip
sudo mv remotly‑relay /srv/remotly
sudo chown -R root:root /srv/remotly
sudo chmod -R 755 /srv/remotly
sudo chmod 600 /srv/remotly/config/remotly‑relay.json
3. Configuration
Edit the configuration: sudo nano /srv/remotly/config/remotly‑relay.json. If possible use the standard HTTPS port 443 — it passes firewalls best.
Non‑TLS configuration:
{
  "tlsEnabled": false,
  "key": "",
  "cert": "",
  "forceTLS": false,
  "domain": "",
  "port": 443,
  "max_bandwidth": 40000000,
  "allowed_bandwidth": 30000000,
  "password": "PasswordPasswordPasswordPassword"
}
TLS configuration (set forceTLS to true to allow only TLS‑encapsulated connections):
{
  "tlsEnabled": true,
  "key": "/etc/letsencrypt/live/relay.example.com/privkey.pem",
  "cert": "/etc/letsencrypt/live/relay.example.com/fullchain.pem",
  "forceTLS": false,
  "domain": "relay.example.com",
  "port": 443,
  "max_bandwidth": 40000000,
  "allowed_bandwidth": 30000000,
  "password": "PasswordPasswordPasswordPassword"
}- tlsEnabled — enables additional TLS encryption; valid cert and key paths are required when true.
- key — absolute path to the certificate's private key in PEM format, e.g. /etc/letsencrypt/live/relay.example.com/privkey.pem.
- cert — absolute path to the full‑chain certificate in PEM format, e.g. /etc/letsencrypt/live/relay.example.com/fullchain.pem.
- forceTLS — when true only TLS 1.2 / 1.3 connections are accepted; both client and host must use TLS.
- domain — domain name assigned to the relay's IP in DNS (recommended, used for SNI).
- port — port used by the relay for communication.
- password — at least 32 characters to restrict access; leave empty to run without a password. A shorter non‑empty password prevents the server from starting.
4. Start the service
- Register the systemd service: sudo bash /srv/remotly/script/installremotlyrelay.sh
- Start it: sudo bash /srv/remotly/script/startremotlyrelay.sh
- Check that it runs: systemctl status remotly‑relay should show active (running).
sudo bash /srv/remotly/script/installremotlyrelay.sh
sudo bash /srv/remotly/script/startremotlyrelay.sh
systemctl status remotly‑relay

# to stop
sudo bash /srv/remotly/script/stopremotlyrelay.sh
Then open http://<relay IP>:<port>/connectionTest (or https://<relay domain>:<port>/connectionTest with TLS) in a browser. You should see the message OK.
The service starts with the system. After changing the configuration run the start script again (it restarts the service); stopremotlyrelay.sh stops it. The log is in /srv/remotly/logs/remotly‑relay.log.
5. Registering the relay in your account
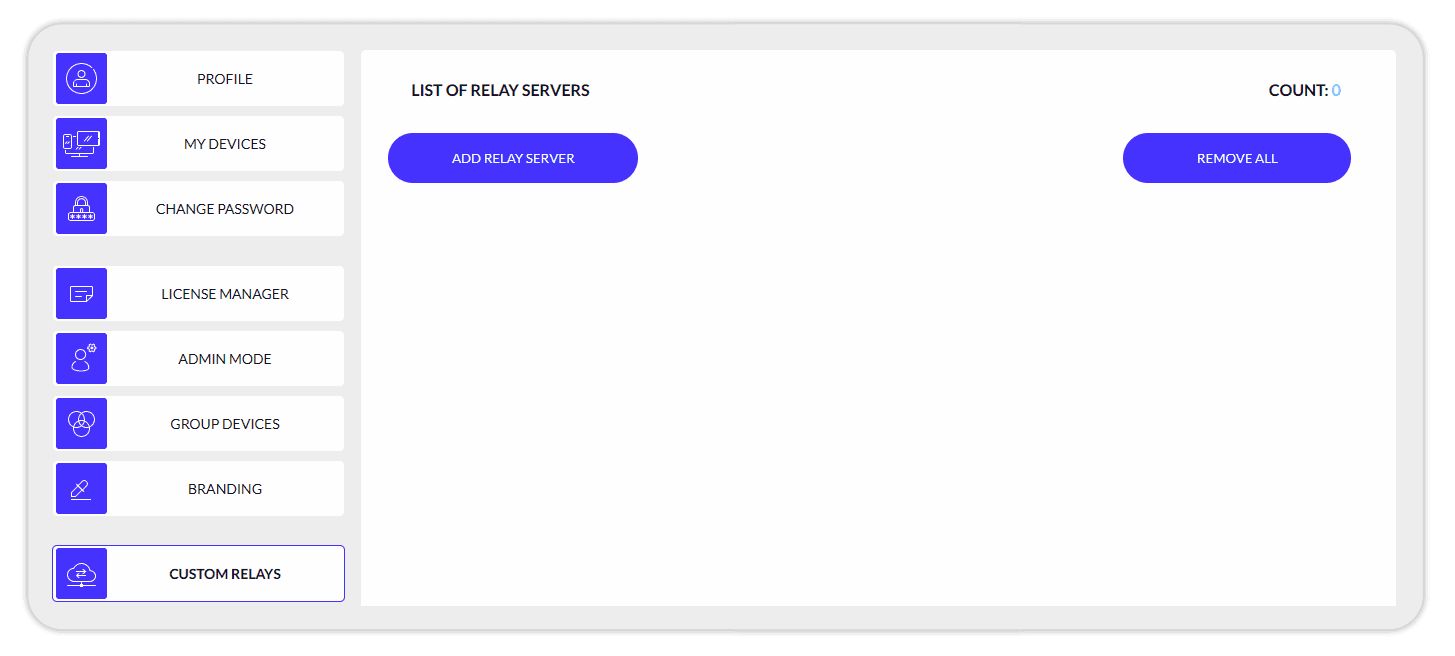
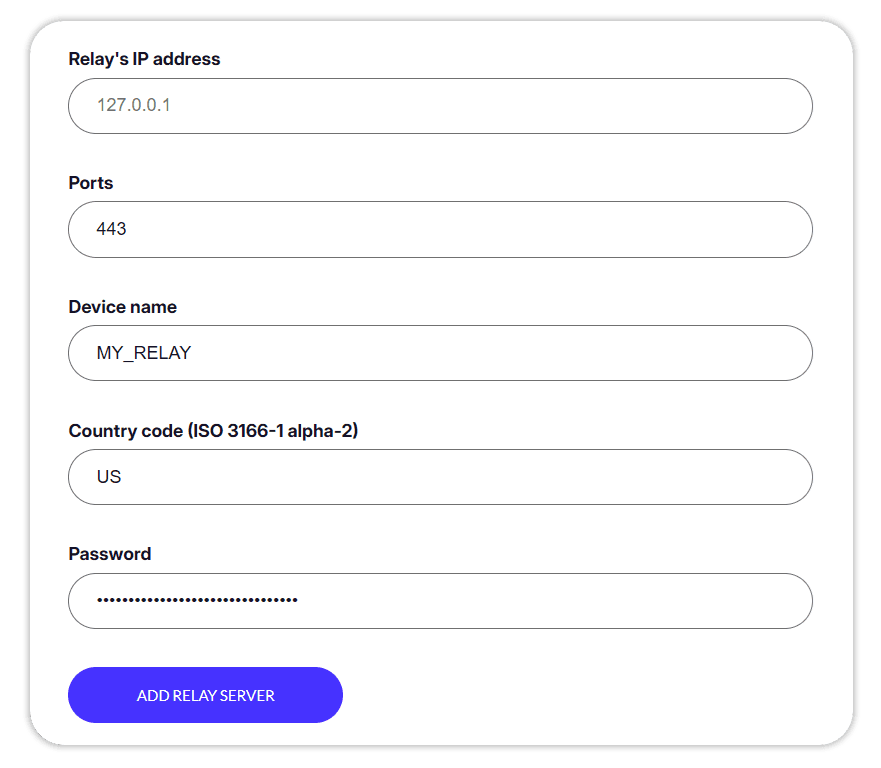
Sign in at remotly.com, open Custom Relays and click Add relay server. Provide the IP address, the port(s) from remotly‑relay.json, a device name visible in the apps, the country code and the same password as in the configuration file.
When connecting to another computer with Force Connect Anywhere enabled, you should now see only the country code and name of your private relay.
Troubleshooting
- connectionTest shows OK but relayed connections fail: your server is probably not reachable from outside your network. Configure port forwarding on your public IP and test from an external browser.
- connectionTest shows OK but connections go through an official Remotly relay: you have not added the custom relay to your account in the web panel.
- The relay runs but connectionTest is unreachable: from inside your network, check that the server firewall does not block the relay port; from outside only, fix the port forwarding on your router.
Questions? Visit the Remotly community.